 * *Android设计模式--*
*之策略模式 **~!*(建造者模式)&**
进行Android单元测试***~!
* 1 public abstract class Animation implements Cloneable { 2 Interpolator mInterpolator; 3 // 通过set方法注入
4 public void setInterpolator(Interpolator i) { 5 mInterpolator = i; 6 } 7 8 public boolean getTransformation(long currentTime,
Transformation outTransformation) { 9 // ... ... 10 // 具体调用
11 final float interpolatedTime = mInterpolator.getInterpolation
(normalizedTime); 12 applyTransformation(interpolatedTime, outTransformation); 13 // ... ...
14 } 15 16 // 缺省实现,是个小技巧,顺便提下,这个不是重点
17 protected void ensureInterpolator() { 18 if (mInterpolator == null) { 19 mInterpolator = new AccelerateDecelerateInterpolator(); 20 } 21 } 22 23 } *
*策略模式其实特别简单(听到这句话,
大家是不是心里一下子放松了?)。
比如排序,官方告诉大家我这里有一个
排序的接口ISort的sort()方法,然后民间
各尽其能,实现这个
排序的方法:冒泡,快速,堆等等。
这些方法就是“不同的策略”。
然后,某个模块下,需要一个排序方法,
但是暂时不能指定具体的sort方法
(出于扩展的考虑),就需 要使
用ISort接口了。
最后,具体什么场景下,传入什么具体的
sort方法,实现灵活的排序。
这就是策略模式!
下面,我们分析Android中的动画是如何使
用策略模式的。
1. 意图
定义一系列的算法,把它们一个个封装起来,
并且使它们可互相替换。
策略模式使得算法可独立于使用它的
客户而变化。
2. 结构图和代码
Animation不同动画的实现,主要是依
靠Interpolator的不同实现而变。

定义接口Interpolator:

 1 package android.animation;
 2
 3 /**
 4  * A time interpolator defines the rate
of change of an animation. This allows
animations
 5  * to have non-linear motion, such as
acceleration and deceleration.
 6  */ 7 public interface Interpolator {
 8
 9     /**
10      * Maps a value representing the
elapsed fraction of an animation to a value
that represents
11      * the interpolated fraction. This
interpolated value is then multiplied by
the change in
12      * value of an animation to derive
the animated value at the current elapsed
animation time.
13      *
14      * @param input A value between 0
and 1.0 indicating our current point
15      *        in the animation where 0
represents the start and 1.0 represents
16      *        the end
17      * @return The interpolation value.
This value can be more than 1.0 for
18      *         interpolators which
overshoot their targets, or less than 0 for
19      *         interpolators that
undershoot their targets.
20      */21     float getInterpolation(float input);
22 }
具体的策略,代码如下:
 1 package android.view.animation;
 2
 3 import android.content.Context;
 4 import android.content.res.TypedArray;
 5 import android.util.AttributeSet;
 6
 7 /**
 8  * An interpolator where the rate of
change starts out slowly and
 9  * and then accelerates.
10  *
11  */12 public class AccelerateInterpolator
implements Interpolator {
13     private final float mFactor;
14     private final double mDoubleFactor;
15
16     public AccelerateInterpolator() {
17         mFactor = 1.0f;
18         mDoubleFactor = 2.0;
19     }
20
21     /**
22      * Constructor
23      *
24      * @param factor Degree to which the
animation should be eased. Seting
25      *        factor to 1.0f produces a
y=x^2 parabola. Increasing factor above
26      *        1.0f  exaggerates the
ease-in effect (i.e., it starts even
27      *        slower and ends evens faster)
28      */29     public AccelerateInterpolator
(float factor) {
30         mFactor = factor;
31         mDoubleFactor = 2 * mFactor;
32     }
33
34     public AccelerateInterpolator
(Context context, AttributeSet attrs) {
35         TypedArray a =
36             context.obtainStyledAttributes
(attrs, com.android.internal.R.styleable.
AccelerateInterpolator);
37
38         mFactor = a.getFloat
(com.android.internal.R.styleable.
AccelerateInterpolator_factor, 1.0f);
39         mDoubleFactor = 2 * mFactor;
40
41         a.recycle();
42     }
43
44     public float getInterpolation
(float input) {
45         if (mFactor == 1.0f) {
46             return input * input;
47         } else {
48             return (float)Math.pow(input,
 mDoubleFactor);
49         }
50     }
51 }
如何在Animation模块实现不同的动画呢?
在这里我想提一个应用很广的概念:
依赖注入。
在Animation模块里实现不同的动画,就是
需要我们把各个Interpolator以父类或者接
口的形式注入进去。
注入的方法一般是构造函数,set方法,
注释等等。
我们看看animation类是怎么做的:
策略模式其实就是多态的一个淋漓精
致的体现。
3. 效果
(1).行为型模式
(2).消除了一些if...else...的条件语句
(3).客户可以对实现进行选择,但是客户必须
要了解这个不同策略的实现(这句话好像是
废话,总而言之,客户需要学习成本)
(4).代码注释中提到了缺省实现,可以让客
户不了解策略,也能实现默认的策略
(5).注入的方式有多种:构造函数,set方法
,注释。配置解析等等 *
{{*如何进行Android单元测试*
*
- Menifest.xml中加入:<application>中加入:
<uses-library android:name="android.test.runner" />
<application>外面加入:
<uses-permission android:name="android. - permission.RUN_
- INSTRUMENTATION" />
<instrumentation android:name="android.test. - InstrumentationTestRunner" android:targetPackage="name.feisky.android.test"
android:label="Test for my app"/> - 编写单元测试代码:必须继承自AndroidTestCase类package name.feisky.android.test;
import android.test.AndroidTestCase;
import junit.framework.Assert;
public class MyTest extends AndroidTestCase {
private static final String Tag="MyTest";
public void testSave() throws Throwable
{
int i=4+8;
Assert.assertEquals(5,i);
}
public void testSomethingElse() throws Throwable {
Assert.assertTrue(1 + 1 == 12);
}
}
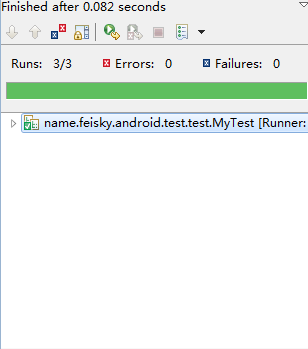
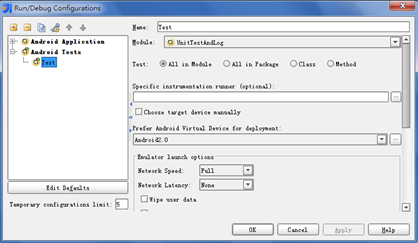
执行测IntelliJ中:
-
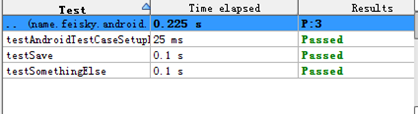
eclipse中:右键 run as Android JUnit Test
命令行工具:
adb shell am instrument -w name.feisky. - android.test/android.test.
- InstrumentationTestRunner
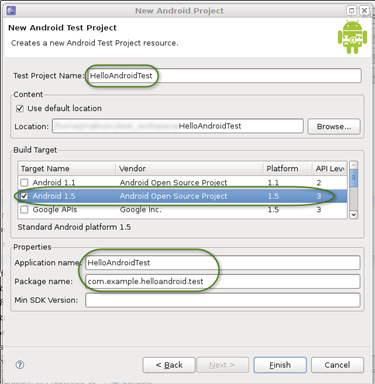
- New > Project > Android > Android Test Project.
- 添加测试用例类添加新类,基类设置
- 为android.test.ActivityInstrumentationTestCase2<HelloAndroid>
- 添加构造函数添加setUp()方法,这个方法在所有的测试之前进行
- 变量和测试环境的初始化。
@Override
protected void setUp() throws Exception {
super.setUp();
mActivity = this.getActivity();
mView = (TextView) mActivity.findViewById(com.example.helloandroid.R.id.textview);
resourceString = mActivity.getString(com.example.helloandroid.R.string.hello);
} - 添加testPreconditions()方法,检查初始化环境,
- 只执行一次public void testPreconditions() {
assertNotNull(mView);
} - 添加单元测试public void testText() {
assertEquals(resourceString,(String)mView.getText());
} - 测试 Run As... > Android JUnit Test *
- (之生成器模式 (建造者模式)*
- *
建造者模式把构造和表示分离开,根据客
户需求生产一个相应的对象。
本来呢,我们根据Builder接口实现不同
的具体的ConcreteBuilder,就可生产
不同的对象了。
但是,下面例子的只有一个Builder,
所以也没有接口Builder,也没有其他的ConcreteBuilder。
但是我今天要讲的例子太简单,简单到
都不觉得是建造者模式,但是又有建造
者模式的感觉。
1. 意图
将一个复杂对象的构建和它的表示分离,
使得同样的创建过程可以创建不同的表示。
2.结构图和代码
android中大量的使用对话框组件,
它的调用方法就是构建,拼接,表示。

Builder通过setTitle(),setMessage(),
setIcon()等方法在create()中构造出一个AlertDialogInstance对象。
然后客户可以把把AlertDialogInstance
对象show出去。
针对这个例子,我有必要通过扩展一下,
以正建造者模式之名。
如何扩展?
(1).创建其他的ConcreteBuilder
(2).创建其他的ElseDialog
(3).第1,2步决定了我们最好创建一个
抽象的Builder
(4).创建一个Context,把builder注入
进去,生产不同的Dialog
(或者其他UI)对象。
3.效果
(1).创建型模式
(2).可以生产不同的Dialog,也可以生产
其他的UI,生产的Product可以是差别很
大的,所以也没必要为Product定义
抽象父类。
户需求生产一个相应的对象。
本来呢,我们根据Builder接口实现不同
的具体的ConcreteBuilder,就可生产
不同的对象了。
但是,下面例子的只有一个Builder,
所以也没有接口Builder,也没有其他的ConcreteBuilder。
但是我今天要讲的例子太简单,简单到
都不觉得是建造者模式,但是又有建造
者模式的感觉。
1. 意图
将一个复杂对象的构建和它的表示分离,
使得同样的创建过程可以创建不同的表示。
2.结构图和代码
android中大量的使用对话框组件,
它的调用方法就是构建,拼接,表示。
Builder通过setTitle(),setMessage(),
setIcon()等方法在create()中构造出一个AlertDialogInstance对象。
然后客户可以把把AlertDialogInstance
对象show出去。
针对这个例子,我有必要通过扩展一下,
以正建造者模式之名。
如何扩展?
(1).创建其他的ConcreteBuilder
(2).创建其他的ElseDialog
(3).第1,2步决定了我们最好创建一个
抽象的Builder
(4).创建一个Context,把builder注入
进去,生产不同的Dialog
(或者其他UI)对象。
3.效果
(1).创建型模式
(2).可以生产不同的Dialog,也可以生产
其他的UI,生产的Product可以是差别很
大的,所以也没必要为Product定义
抽象父类。


 *
*- &&&&&&&&&&&&&&&&&&&&&&&&&&&&&&&&&&&&&&&&&&&&&&&&&&&&&&
&&&&&&&&&&&&&&&&&&&&&&&&&&&&&&&&&&&&&&&&&&&&&&&&&&&&&&&&&&&&&&&&&&&&&&&&&&&&&&&&&&&&&&&&&&&&&&&
沒有留言:
張貼留言
if you like make fds, wellcome you here~~anytime***
my free place for everyones who want the good software,
come & download them~ wellcome!!