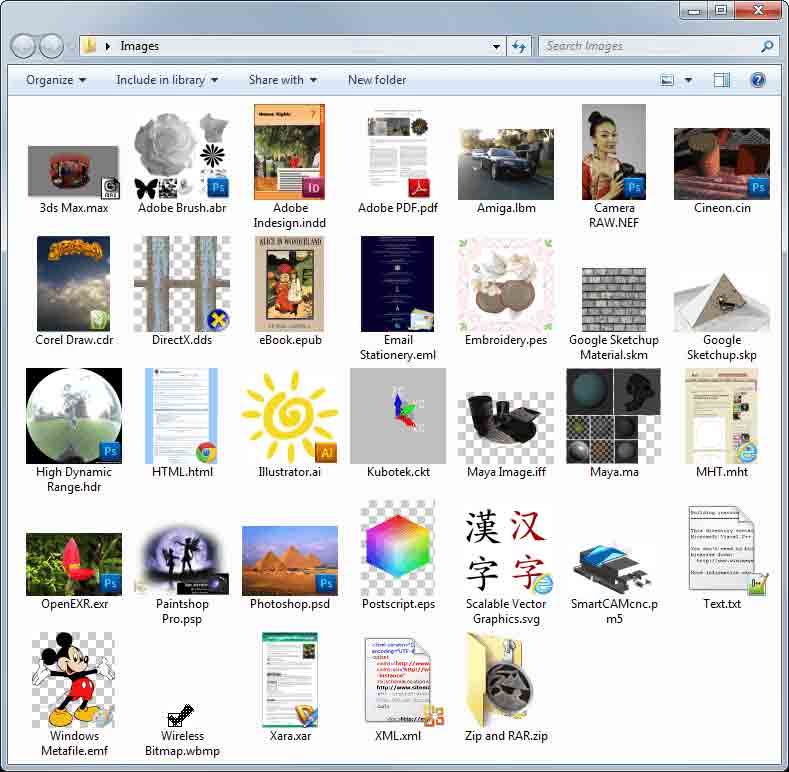
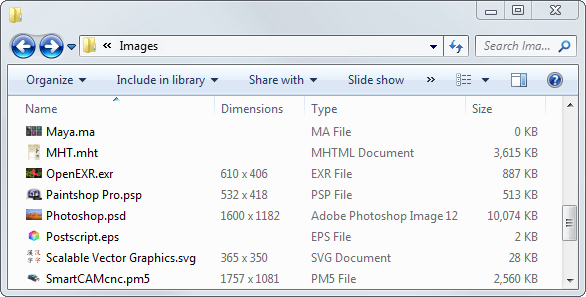
**Windows*可*即時**
預覽PSD、DDS、
TGA、SGI﹑AI~!!
**mysticthumbs –
多國語言版本 繁簡通用))=
**在Windows下 PSD、
DDS、TGA、SGI﹑AI
即時預覽縮略圖,不需要
安裝無用的補丁,不用更
改繁複的修改,
只要一個小小的程式 ((就能可以的!!
**mysticthumbs – 多國語言版本
繁簡通用
請根據OS 版本,x86 Installer
(32 bit OS) ,
x64 Installer (64 bit OS)
下載: http://mysticcoder.net/
mysticthumbs
安裝後,請在"控制台"或"文件夾"上方"
檢視"選擇"縮圖"
另外,PSD 取得縮略圖預覽的技巧
點選photoshop中的 “編輯" 選單,點選
“偏好設定" 中的檔案處理,
在 影像預視 中選擇 “永遠儲存" 再按
“確定" 鈕,之後重新儲存的PSD即會
同時儲存預視小圖了!!
**
**
- Photoshop, RAW Photography images,
- DirectX, Targa & PowerVR game
- textures and all sorts of other images
- never looked so good in Explorer!
- All suported file types are all fully
- configurable.
- Transparency support - opaque,
- transparent, checkerboard.
- Image viewer to inspect all supported file
- types via context menu.
- Individual image customization via
- context menu.
- Embedded thumbnail or full
- image extraction.
- Enchanced support for native Windows
- supported images, PNG, TIFF, BMP etc.
- .wav sound files displayed as a waveform!
- Customizable file type icon overlays.
- Thumbnail adornment option, shadow
- or flat (no frame).
- Per image adjustments via context menu.
- Force transparent thumbnails on
- desktop option.
- Regular updates.
- Plugin support so you can add your
- own formats.
- **Languages: English, Arabic, Chinese,
- Dutch, French, German, Greek, Hebrew,
- Italian, Japanese, Korean, Portuguese,
- Russian, Spanish, Swedish.**
()+See a more complete feature list
here**
**
Download v3.1.0 (Windows 8 / 7 / Vista
/ XP) 30 day free trial and enjoy seeing
your images in Explorer now!
Unified Installer for 32 and
64 bit Windows
This is both the trial
and full program.
Product keys supporting this
version (within the last year)
unlock all features.

Install Notes
- Starting from version 2.6.6 Mystic
- Thumbs is signed using a Microsoft®
- Authenticode® Certificate. Do not
- install if you have received from a
- third party source and receive an
- unknown publisher warning.
- Install and updates require
- Administrator privileges
**Example 0. How it works
In IE with IEWebGL installed, you create
an object element, instead of canvas element
as shown below. Then you can get webgl context
from that element as usually:
1
2
3
4
5
6
7
8
9
10
11
12
13
14
15
16
17
18
19
20
21
22
23
24
25
26
27
28
29
30
31
32
33
34
35
|
<!DOCTYPE html>
<html>
<head>
<script type="text/javascript">
function InitWebGLContext() {
var glCanvas = document.getElementById("glCanvas");
var gl = glCanvas.getContext("webgl");
if (!gl) {
gl = glCanvas.getContext("experimental-webgl");
}
if (!gl) {
alert("Your browser does not support WebGL");
return;
}
alert(
"WebGL version=" + gl.getParameter(gl.VERSION) + "\n"
"WebGL vendor=" + gl.getParameter(gl.VENDOR) + "\n" +
"WebGL renderer=" + gl.getParameter(gl.RENDERER) + "\n"
);
}
</script>
</head>
<body onload="InitWebGLContext()">
<object style="width:100%;height:100%" id="glCanvas"
type="application/x-webgl"></object>
</body>
</html>
|
Example 1. Inlining into markup
Consider the very simple page with canvas and
WebGL context:
1
2
3
4
5
6
7
8
9
10
11
12
13
14
15
16
17
18
19
20
21
22
23
24
25
26
27
28
29
30
31
32
33
34
|
<!DOCTYPE html>
<html>
<head>
<script type="text/javascript">
function InitWebGLContext() {
var glCanvas = document.getElementById("glCanvas");
var gl = glCanvas.getContext("webgl");
if (!gl) {
gl = glCanvas.getContext("experimental-webgl");
}
if (!gl) {
alert("Your browser does not support WebGL");
return;
}
alert(
"WebGL version=" + gl.getParameter(gl.VERSION) + "\n" +
"WebGL vendor=" + gl.getParameter(gl.VENDOR) + "\n" +
"WebGL renderer=" + gl.getParameter(gl.RENDERER) + "\n"
);
}
</script>
</head>
<body onload="InitWebGLContext()">
<canvas style="width:100%;height:100%" id="glCanvas"></canvas>
</body>
</html>
|
Now lets turn it to use IEWebGL or native
WebGL, depending on whether it is supported.
(Note: webglhelper.js is designed so, that if in
the future Internet Explorer will support WebGL
natively - the library will choose native WebGL
instead of IEWebGL plugin, so you will not have
to change your code to support new browser):
1
2
3
4
5
6
7
8
9
10
11
12
13
14
15
16
17
18
19
20
21
22
23
24
25
26
27
28
29
30
31
32
33
34
35
36
37
38
39
40
41
42
43
44
45
46
47
48
49
|
<!DOCTYPE html>
<html>
<head>
type="text/javascript">
</script>
<script type="text/javascript">
function InitWebGLContext() {
var glCanvas = document.getElementById("glCanvas");
var gl = glCanvas.getContext("webgl");
if (!gl) {
gl = glCanvas.getContext("experimental-webgl");
}
if (!gl) {
alert("Your browser does not support WebGL");
return;
}
alert(
"WebGL version=" + gl.getParameter(gl.VERSION) + "\n" +
"WebGL vendor=" + gl.getParameter(gl.VENDOR) + "\n" +
"WebGL renderer=" + gl.getParameter(gl.RENDERER) + "\n"
);
}
function OnGLCanvasCreated(canvasElement, elementId) {
InitWebGLContext();
}
function OnGLCanvasFailed(canvasElement, elementId) {
alert("Your browser does not support WebGL");
}
</script>
</head>
<body>
<script id="WebGLCanvasCreationScript" type="text/javascript"
style="width:100%;height:100%">WebGLHelper.CreateGLCanvasInline(
'glCanvas', OnGLCanvasCreated, OnGLCanvasFailed)
</script>
</body>
</html>
|
Here we replaced the original <canvas> element
with special <script> element. This script creates
<canvas> or <object> in place of itself. It detects if
the browser supports WebGL, and if it isn't and
browser is IE, it creates <object> element,
that loads IEWebGL plugin.
You see two new functions OnGLCanvasCreated
and OnGLCanvasFailed. They are handlers for
successful and unsuccessful canvas/object
creation result. The reason for fail can be user's
cancellation of the plugin installation in IE. The
handlers are very convenient. All handling of plugin installation, updates and initialization is
hidden inside WebGLHelper.js library, you don't
have to worry about all that stuff.
Also, as you see, you can still use style attribute
on <script> element, although it can't be applied
to <script> element directly, it is applied (copied)
to <canvas> or <object> element by the script.
Separate CSS definitions can also be applied to
<canvas> or <object> element, using id ("glCanvas"
in this example), you pass to WebGLHelper.CreateGLCanvasInline().
Using WebGLHelper.js is very easy. If you
already have existing WebGL pages and want
your site to work in Internet Explorer and with
IEWebGL, only few lines of code are needed!
If your user hasn't installed IEWebGL plugin yet,
or if newer IEWebGL plugin version is available,
the browser will propose to install or update plugin.
In all other WebGL capable browsers there will be
no superfluous messages.
Example 2. Creating canvas and getting WebGL
context from JavaScript
The Example 1 shows declarative style of creating
canvas, but you may decide to create canvas
from JavaScript. Lets look the sample page code:
1
2
3
4
5
6
7
8
9
10
11
12
13
14
15
16
17
18
19
20
21
22
23
24
25
26
27
28
29
30
31
32
33
34
35
36
37
38
39
40
41
42
43
44
45
46
47
48
49
50
51
52
53
54
|
<!DOCTYPE html>
<html>
<head>
type="text/javascript">
</script>
</head>
<script type="text/javascript">
function InitWebGLContext() {
var glCanvas = document.getElementById("glCanvas");
var gl = glCanvas.getContext("webgl");
if (!gl) {
gl = glCanvas.getContext("experimental-webgl");
}
if (!gl) {
alert("Your browser does not support WebGL");
return;
}
alert(
"WebGL version=" + gl.getParameter(gl.VERSION) + "\n" +
"WebGL vendor=" + gl.getParameter(gl.VENDOR) + "\n" +
"WebGL renderer=" + gl.getParameter(gl.RENDERER) + "\n"
);
}
function OnGLCanvasCreated(canvasElement, elementId) {
InitWebGLContext();
}
function OnGLCanvasFailed(canvasElement, elementId) {
alert("Your browser does not support WebGL");
}
function Init() {
var cnv = WebGLHelper.CreateGLCanvas(
document.getElementById('renderArea'),
'glCanvas', false, OnGLCanvasCreated, OnGLCanvasFailed);
}
</script>
</head>
<body onload="Init()">
<div id="renderArea">
</div>
</body>
</html>
|
This example creates child element
(<canvas> or <object>, depending of
browser capabilities) inside parent <div>.
Init() function is executed after browser finished
loading the page body and WebGLHelper.
CreateGLCanvas() creates canvas using
the same handlers as in previous sample.
Example 3. Creating WebGL context with helper
Different browser vendors use the
"exprimental-" prefix while their WebGL
implementations evolve, so to be ready for final implementations, we should write code, that tries
to create WebGL context, using standard context
name that is "webgl", and "experimental-webgl". WebGLHelper.js have the utility function for that.
Let's look the sample code.
1
2
3
4
5
6
7
8
9
10
11
12
13
14
15
16
17
18
19
20
21
22
23
24
25
26
27
28
29
30
31
32
33
34
35
36
37
38
39
40
41
42
43
44
|
<!DOCTYPE html>
<html>
<head>
type="text/javascript">
</script>
<script type="text/javascript">
function InitWebGLContext() {
var gl = WebGLHelper.GetGLContext(
document.getElementById("glCanvas"));
if (!gl) {
alert("Your browser does not support WebGL");
return;
}
alert(
"WebGL version=" + gl.getParameter(gl.VERSION) + "\n" +
"WebGL vendor=" + gl.getParameter(gl.VENDOR) + "\n" +
"WebGL renderer=" + gl.getParameter(gl.RENDERER) + "\n"
);
}
function OnGLCanvasCreated(canvasElement, elementId) {
InitWebGLContext();
}
function OnGLCanvasFailed(canvasElement, elementId) {
alert("Your browser does not support WebGL");
}
</script>
</head>
<body>
<script id="WebGLCanvasCreationScript" type="text/javascript"
style="width:100%;height:100%">WebGLHelper.CreateGLCanvasInline(
'glCanvas', OnGLCanvasCreated, OnGLCanvasFailed)
</script>
</body>
</html>
|
This example is slightly modified version of the
Example 2. If neither standard, nor experimental
WebGL context can be created, WebGLHelper.CreateGLContext() returns null;
Example 4. Styling plugin loading screen
When IE user comes to IEWebGL compatible
site for the first time, he sees the plugin loading
splash screen,
you can adapt this screen to your site's look
and feel, by using special property of
WebGLHelper object.
1
2
3
4
5
6
7
8
9
10
11
12
13
14
15
16
17
18
19
20
21
22
23
24
25
26
27
28
29
|
<!DOCTYPE html>
<html>
<head>
type="text/javascript">
</script>
<script type="text/javascript">
function OnGLCanvasCreated(canvasElement, elementId) {
}
function OnGLCanvasFailed(canvasElement, elementId) {
}
</script>
</head>
<body>
<script id="WebGLCanvasCreationScript" type="text/javascript"
style="width:100%;height:100%">
WebGLHelper.autoLoadScreen.innerHTML = "DEMO DESIGN HERE";
WebGLHelper.CreateGLCanvasInline(
'glCanvas', OnGLCanvasCreated, OnGLCanvasFailed);
</script>
</body>
</html>
|
Standard compatibility
IEWebGL fully implements WebGL v1.0
specification. See our unit tests in the next section.
The important feature of IEWebGL is support
of JavaScript debugger:
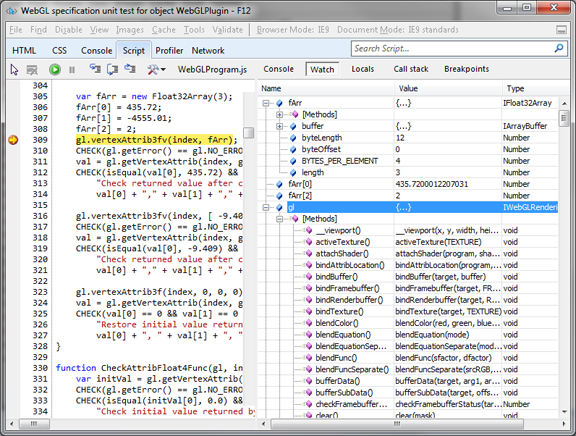
and console error logging:
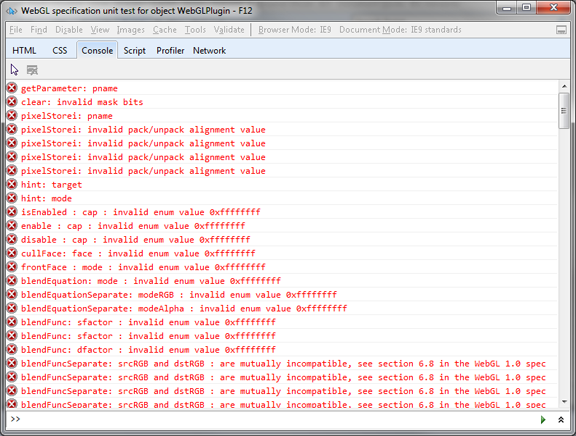
Unit tests
We publish our unit test suite to unsure
standard compatibility and interoperable
behaviour with another webgl implementations.
TypedArray unit tests:
ArrayBuffer,
Uint8Array,
Int8Array,
Uint16Array,
Int16Array,
Uint32Array,
Int32Array,
Float32Array,
Float64Array,
DataView,
Mixed
WebGL objects unit tests:
WebGLRenderingContext,
WebGLShader,
WebGLBuffer,
WebGLProgram,
WebGLTexture,
WebGLRenderbuffer,
WebGLFramebuffer,
WebGLExtensions,
WebGLFunctional
Non-standard behaviour
1. Texturing
IE6, IE7 and IE8 browsers do not support
HTML5 video and canvas so textures can't be
created from that objects.
2. Events
In IE6, IE7 and IE8 WebGL's
"webglcontextcreationerror",
"webglcontextlost" and "webglcontextrestored"
events are emulated using "onerror" event.
To distinguish WebGL event from others, check the "webglEventType" property of the event object,
it contains the name of WebGL event.
3. Draw canvas to canvas
HTML canvas specification says that you can
draw image from one canvas to another canvas
using 2d context's drawImage() method. As
specification says drawImage() can draw image,
canvas or video elements. As you know, IEWebGL
plugin is actually an object element, so it can't be
drawn to regular canvas directly. Here we show
the way how to use non-standard IEWebGL
extension to achieve the same result.
1
2
3
4
5
6
7
8
9
10
11
12
13
14
15
|
function CopyCanvas() {
var nativeCnv = document.getElementById("nativeCanvas");
nativeCnv.width = nativeCnv.scrollWidth;
nativeCnv.height = nativeCnv.scrollHeight;
var webglCnv = document.getElementById("webglCanvas");
var ctx2D = nativeCnv.getContext("2d");
webglCnv.updateNativeCanvas();
ctx2D.drawImage(webglCnv.getNativeCanvas(), 0, 0);
}
|
The webglCnv.updateNativeCanvas() call
updates hidden canvas created by IEWebGL
plugin with current IEWebGL plugin picture.
The webglCnv.getNativeCanvas() method
returns the hidden canvas object, and you
can use it anythere as any other native canvas.
4. Read binary data from XMLHTTPRequest
object in IE8 and IE9 (as they do not support .responseType="arraybuffer")
Using IEWebGL you can create any TypedArray object from xhr.responseBody:
1
2
3
4
5
6
7
8
9
10
11
12
13
14
15
|
function loadArrayBuffer(uri, callback) {
var xhr = new XMLHttpRequest();
xhr.open('GET', uri, true);
xhr.onreadystatechange = function(e) {
if (xhr.readyState == 4 && xhr.status == 200) {
var byteView = new Uint8Array(xhr.responseBody);
callback(byteView.buffer);
}
}
xhr.send(null);
}
|
Special settings
1. Local content
To allow IEWebGL plugin to load local content,
create empty file named "IEWebGLAllowLocalContent"
(without extension) in your Windows directory~~
&&&&&&&&&&&&&&&&&&&&&&&&&&&&&&&&&&&&&&&&&&&
 **線上( 2 ).☆數十種免費 **免下載~


 **
**


 YO**^
YO**^ YO**^
YO**^